
 Bring home the Wild West with this easy to make two-part DIY belt that converts into a full range of bondage gear: handcuffs, legcuffs, hogtie cuffs, gag, and collar. Having this naughty, ever so stylish, secret bound round your waist will let you schedule your own rodeo events whenever, and wherever, your fantasies take you. Why pay for admission to the Calgary Stampede when all the best rides are just a hogtie away? Let the cowboys keep their rope for tying up cattle and lassoing unruly cowgirls. Animals like you and I know that Western bondage is best played with furry cuffs made from nylon webbing.
 Supplies for this easy artistic bondage DIY project:
1/2 m fabric (Walmart short pile cow print faux fur shown)
1 1/2 m 25mm (1″) brown nylon webbing
2 black nylon side release buckles (25mm)
2 metal rings (1 1/2″ diameter)
safety pins/lighter/thread/scissors/sewing machine (or hand sew)
DIY Instructions:
1) Cut nylon webbing into 4 equal pieces and adjust lengths with safety pins to fit desired submissive’s wrists and ankles. See pic of how cuffs will work and measure accordingly.  Make sure you leave enough excess webbing for belt (when both cuffs are buckled to each other end to end).
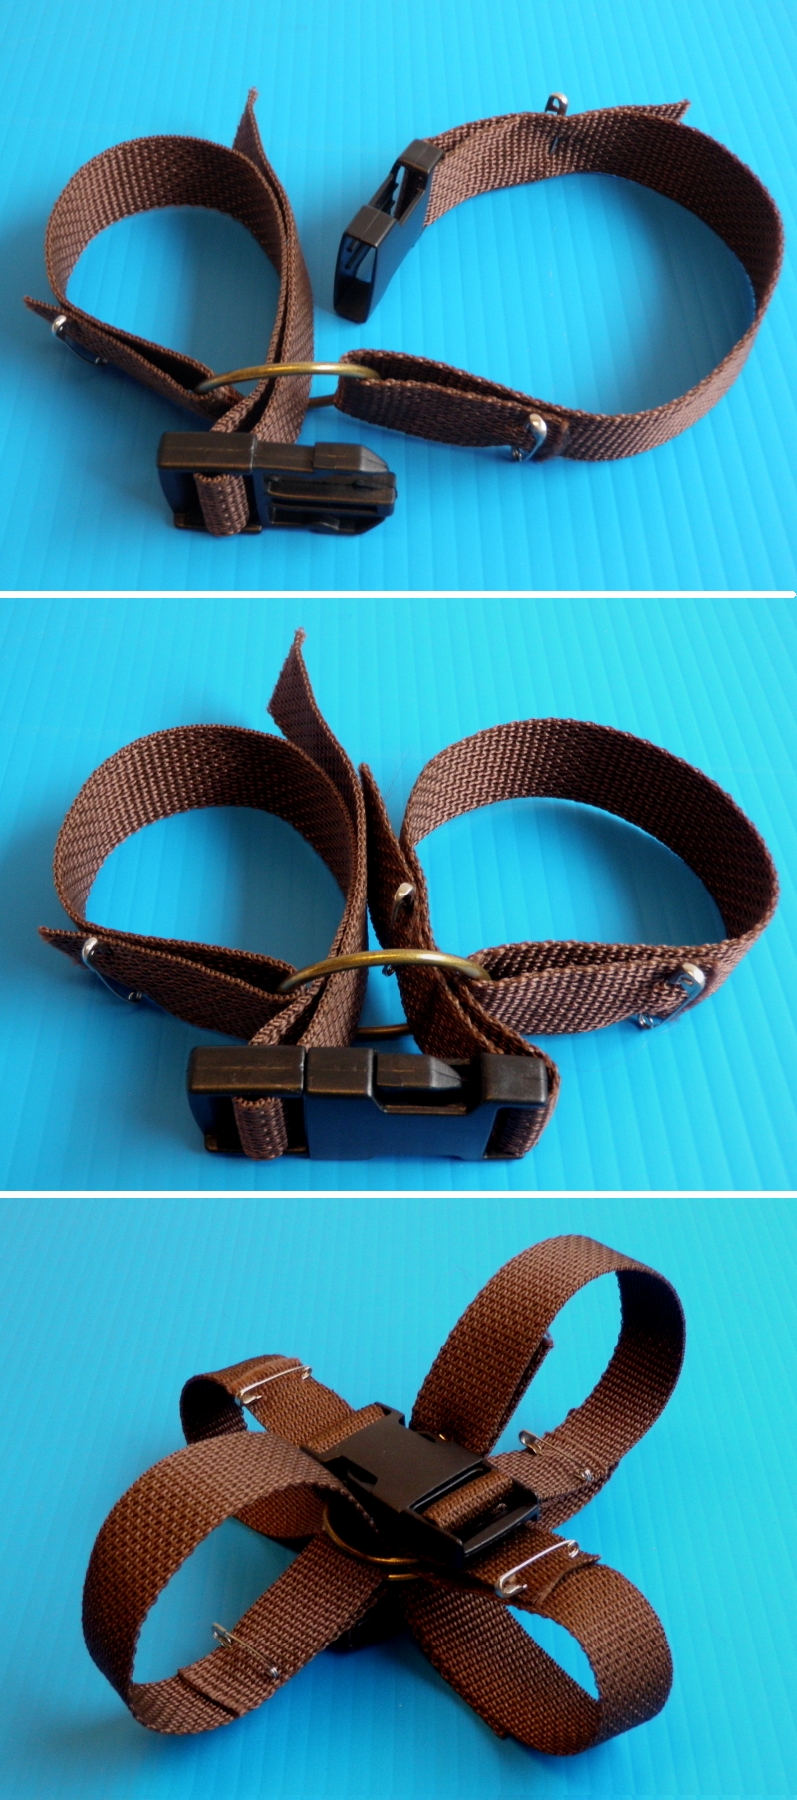 2) Securely sew webbing as marked by safety pins. Cauterize ends of webbing with lighter, being careful not to melt surrounding webbing.
3) Cut 4 rectangles of fabric – 4 inches wide with lengths determined by webbing between buckle and ring + 1/2inch hem allowance on either side. Hem width edges, fold over, and sew wrong sides together along lengths. Turn right side out and slide over buckles to cover webbing.
4) Practice changing BDSM sex toy modes according to the illustrations and pictures in this post. Just like training for any rodeo or bondage technique, practice makes perfect!
Important Notes:
-If you want to switch domination and submission roles, or go out to find new limbs to bind, you can use the pictured figure eight cuff variation to accommodate an infinite variety of wrist and ankle sizes in these homemade furry handcuffs and legcuffs.
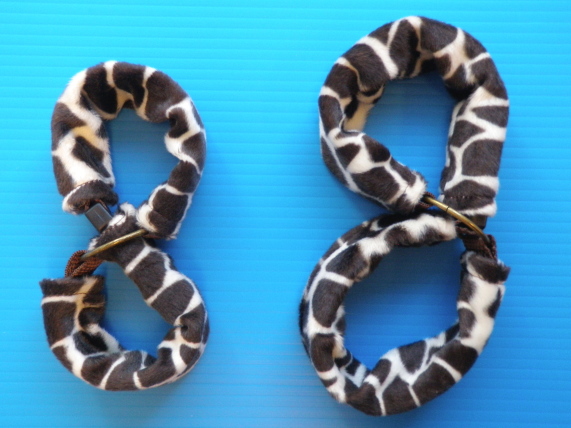
-For the latter variation, and belt configuration, fabric tube can be pulled over buckles for style and comfort.
-Fabric tube can be rolled in over itself if bunching occurs in belt configuration.
-Play safe! …but not too safe ~wink.


